My sister told me yesterday that mantles and banisters are the best for Christmas decorating. How true, right? The Apple House has a very special mantle and banister, they are both made of apple wood from the orchard.
I have never had a mantle before, so I was very excited to get to decorate it for Christmas.
It's not a small job. The mantle is 10 feet long and about 5 feet off the ground, much higher than your typical mantle. That posed some challenges.
Off to the far right are the three little trees I made from burlap, tea stained coffee filters and buttons. I painted a piece of scrap lumber to provide some variety in height. I bought those cute lamb skin boots for Leo, but they didn't fit the giant baby. Oh well, they make a charming addition to a winter themed display. Link and I purchased the jug on our first trip to this area several years ago. It was made by a local artist. I would have never thought then we would be every be living over here!

The polar bear print was a gift to my parents from my uncle many years ago. It doesn't fit well in the style and decor of their home, and it eventually ended up in their basement. When Link and I got married I went "shopping" for art to hang on our walls down there. This is one of the items that I took and it has hung in various places in our homes ever sense. I love it. It reminds me that in nature, with no need for pretenses, the most ferocious hunters living in the harshest climate find no need to disguise sweetness and affection.
The nativity set is one of a few that I own, but it is my favorite. You will probably laugh, but it was given to me by the younger brother of my high school boyfriend long before Link and I ever dated. I love the simplicity of it. I found a weathered piece of lumber to provide some height variation and to prop up the baby Jesus a bit, as the mantle is so high that you could not easily see him.
We don't know where the giant pine cones came from. They were in the house when we got here. They are very cool, though. We think they are from a Jeffery Pine, but aren't sure. The cone tree in the back I also made. I hot glued some leftover
Detra in a cone, then covered it in craft paper and tied a ribbon around it. Simple and cute. To the left is another simple nativity that I made a few years ago.
All of the greenery was cut from a huge pine tree in my front yard.
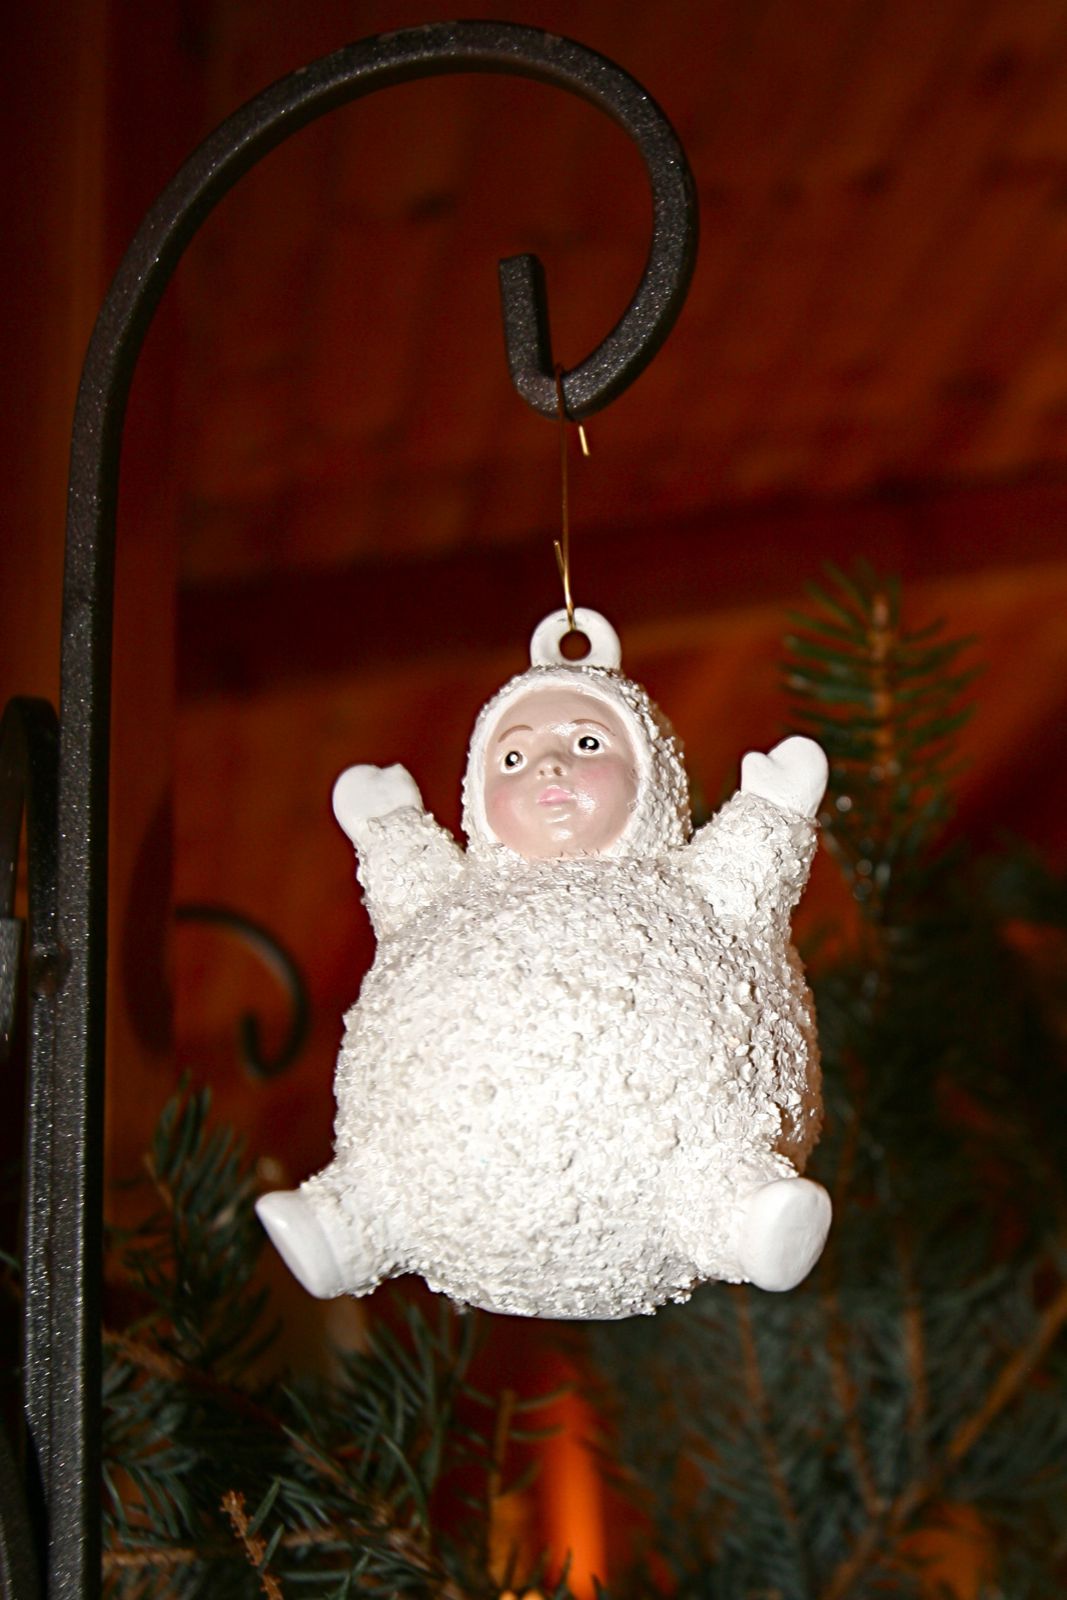
I picked up these ornaments last weekend at a craft bazaar. The woman who makes them pours them, fires them, and paints them. I HAD to have this one for Leo's first Christmas ornament. Could anything be more perfect for my little chunk?
John Henry is currently loving a game we call "Amazing Tricks!" The kid can twist himself into all sorts of crazy positions and move in ways that humans really weren't meant to. This pose happens to be one of his favorites right now. Perfect.
I will add the stockings I am working on under the mantle before Christmas along with my favorite advent calendar. Link's aunt gave it to me. Each day has a little knit hat or mitten with the appropriate number knit into it. Inside of each is a cute hand painted ornament. John Henry LOVES to get out the ornaments and hang them on the little tree we got for him.